Introduction
If you've been working with bare-metal STM32 development using HAL or CubeMX, you've probably heard about Zephyr RTOS - the Linux Foundation's open-source, production-grade real-time operating system that's gaining serious traction in the embedded industry.
In this article, I'll walk you through setting up Zephyr from scratch on Ubuntu 22.04. I use the STM32 Nucleo F103RB (Cortex-M3, 128 KB Flash, 20 KB RAM) as my target board throughout, but the setup steps are identical for any Zephyr-supported board. We'll build and flash the classic blinky sample, and I'll share every pitfall I hit along the way so you don't have to.
By the end of this guide, you'll have a fully working Zephyr toolchain and a blinking LED on your board.
Prerequisites
- A Zephyr-supported board (this article uses the STM32 Nucleo F103RB)
- Ubuntu 22.04 (or similar Debian-based distro)
- USB cable appropriate for your board
- A flash programmer compatible with your board. For the Nucleo F103RB, STM32CubeProgrammer (download here) is used via the onboard ST-Link. Other boards may use OpenOCD, nrfjprog, or pyOCD -
west flashselects the right one automatically based on your board definition. - Basic familiarity with the Linux terminal
Step 1 - Install System Dependencies
Zephyr requires a set of system packages for its build system (CMake + Ninja), device tree compiler, and Python tooling. Install them all at once:
sudo apt install --no-install-recommends \
  git cmake ninja-build gperf ccache dfu-util \
  device-tree-compiler wget python3-dev python3-venv \
  python3-tk xz-utils file make gcc gcc-multilib \
  g++-multilib libsdl2-dev libmagic1
Most of these will already be present on a typical Ubuntu 22.04 development machine.
Step 2 - Upgrade Python to 3.12
This is the most important prerequisite that the official documentation doesn't always emphasize clearly. Zephyr SDK 1.0 and Zephyr 4.x require Python 3.12 or higher. Ubuntu 22.04 ships with Python 3.10 by default, which will cause cryptic CMake errors during the build.
Install Python 3.12 from the deadsnakes PPA:
sudo add-apt-repository ppa:deadsnakes/ppa
sudo apt update
sudo apt install python3.12 python3.12-venv python3.12-dev
Set Python 3.12 as the system default:
sudo update-alternatives --install /usr/bin/python3 python3 /usr/bin/python3.10 1
sudo update-alternatives --install /usr/bin/python3 python3 /usr/bin/python3.12 2
sudo update-alternatives --config python3
When prompted, select the entry for Python 3.12. Verify:
python3 --version
# Python 3.12.x
⚠️ Why this matters: Zephyr's CMake modules call
find_package(Python3 3.12). If the system Python is older, CMake fails immediately - even if your venv has the correct version. The system Python must be 3.12+.
Step 3 - Create a Python Virtual Environment
Zephyr uses West, its meta-tool, which must be installed in an isolated Python environment to avoid conflicts with system packages.
python3.12 -m venv ~/zephyrproject/.venv
source ~/zephyrproject/.venv/bin/activate
You should see (.venv) prepended to your prompt. Verify the Python version inside the venv:
python3 --version
# Python 3.12.x
which python3
# /home/<user>/zephyrproject/.venv/bin/python3.12
Step 4 - Install West
West is Zephyr's workspace management tool - it handles fetching the Zephyr source, modules, and toolchains.
pip install west
Step 5 - Initialize the Zephyr Workspace
Initialize the workspace and fetch all Zephyr source code and modules:
west init ~/zephyrproject
cd ~/zephyrproject
west update
west updatedownloads Zephyr and all its modules (HAL drivers, Bluetooth stack, crypto libraries, etc.). This can take 5 to 15 minutes depending on your internet connection. Be patient.
Step 6 - Export the Zephyr CMake Package
This step registers Zephyr with CMake so it can be found automatically during builds:
west zephyr-export
Step 7 - Install Python Requirements
Zephyr has a set of Python dependencies used by its build scripts and device tree tooling:
pip install -r ~/zephyrproject/zephyr/scripts/requirements.txt
Step 8 - Install the Zephyr SDK
The Zephyr SDK contains the cross-compiler toolchain for all supported architectures, including the arm-zephyr-eabi toolchain we need for the STM32 Cortex-M3.
Download and extract the GNU SDK bundle:
cd ~
wget https://github.com/zephyrproject-rtos/sdk-ng/releases/download/v1.0.1/zephyr-sdk-1.0.1_linux-x86_64_gnu.tar.xz
tar xvf zephyr-sdk-1.0.1_linux-x86_64_gnu.tar.xz
cd zephyr-sdk-1.0.1
./setup.sh
The setup.sh script registers the SDK with CMake so West can locate it during builds.
Step 9 - Build the Blinky Sample
Now the fun part. Before building, you need to know your board's exact identifier as recognized by Zephyr. There are three ways to find it.
Option 1 - Browse the Zephyr documentation. The official Zephyr supported boards page lists every supported board organized by vendor. Each board page shows the exact identifier to use with -b.
Option 2 - Search directly in the boards folder. Every supported board has a definition folder under zephyr/boards/<vendor>/<board_name>/. You can browse it:
ls ~/zephyrproject/zephyr/boards/
# Lists all vendor folders: st, nordic, raspberrypi, nxp, etc.

ls ~/zephyrproject/zephyr/boards/st/
# Lists all ST boards: nucleo_f103rb, nucleo_f401re, stm32f4_disco, etc.
Option 3 - Use west boards. List all supported boards and filter by keyword:
west boards                        # list everything
west boards | grep nucleo          # filter by name
west boards | grep nrf52           # filter by SoC family
west boards | grep st              # filter by vendor
The string you see in the output is exactly what you pass to -b.
Navigate to the Zephyr source directory (where the samples live) and build, replacing nucleo_f103rb with your board identifier:
cd ~/zephyrproject/zephyr
west build -p always -b <your_board> samples/basic/blinky
For example:
west build -p always -b nucleo_f103rb samples/basic/blinky   # STM32 Nucleo F103RB
west build -p always -b nrf52840dk samples/basic/blinky       # Nordic nRF52840 DK
west build -p always -b rpi_pico samples/basic/blinky         # Raspberry Pi Pico
Not sure of your board identifier? Run west boards to list all supported boards.
What each flag means:
-p always- pristine build, cleans the build directory before starting-b <your_board>- targets your board definitionsamples/basic/blinky- path to the sample, relative to the Zephyr root
A successful build ends with output like this:
[151/151] Linking C executable zephyr/zephyr.elf
Memory region         Used Size  Region Size  %age Used
           FLASH:       15316 B       128 KB     11.69%
             RAM:          4 KB        20 KB     20.00%
Only 15 KB of Flash and 4 KB of RAM for a fully functional RTOS application - that's Zephyr's efficiency on a Cortex-M3.
The build system detected our board automatically:
- Board:
nucleo_f103rb, qualifier:stm32f103xb - Compiler: GCC 14.3.0 (
arm-zephyr-eabi) - Zephyr version: 4.4.99
Step 10 - Flash to the Board
Connect your board via USB and run:
west flash
West reads your board's board.cmake file to determine which flash runner to use and selects it automatically. For the Nucleo F103RB it uses STM32CubeProgrammer via the onboard ST-Link over SWD:
west flash → runner: stm32cubeprogrammer → ST-Link V2 (USB) → SWD → STM32F103
You'll see output like:
ST-LINK SN  : 066AFF545589564867122620
ST-LINK FW  : V2J45M30
Board       : NUCLEO-F103RB
Voltage     : 3.25V
Device ID   : 0x410
Device name : STM32F101/F102/F103 Medium-density
Flash size  : 128 KBytes
Device CPU  : Cortex-M3

Opening and parsing file: zephyr.hex
Erasing internal memory sectors [0 14]
[==================================================] 100%
File download complete
Time elapsed during download operation: 00:00:01.475
Application is running...
Start operation achieved successfully
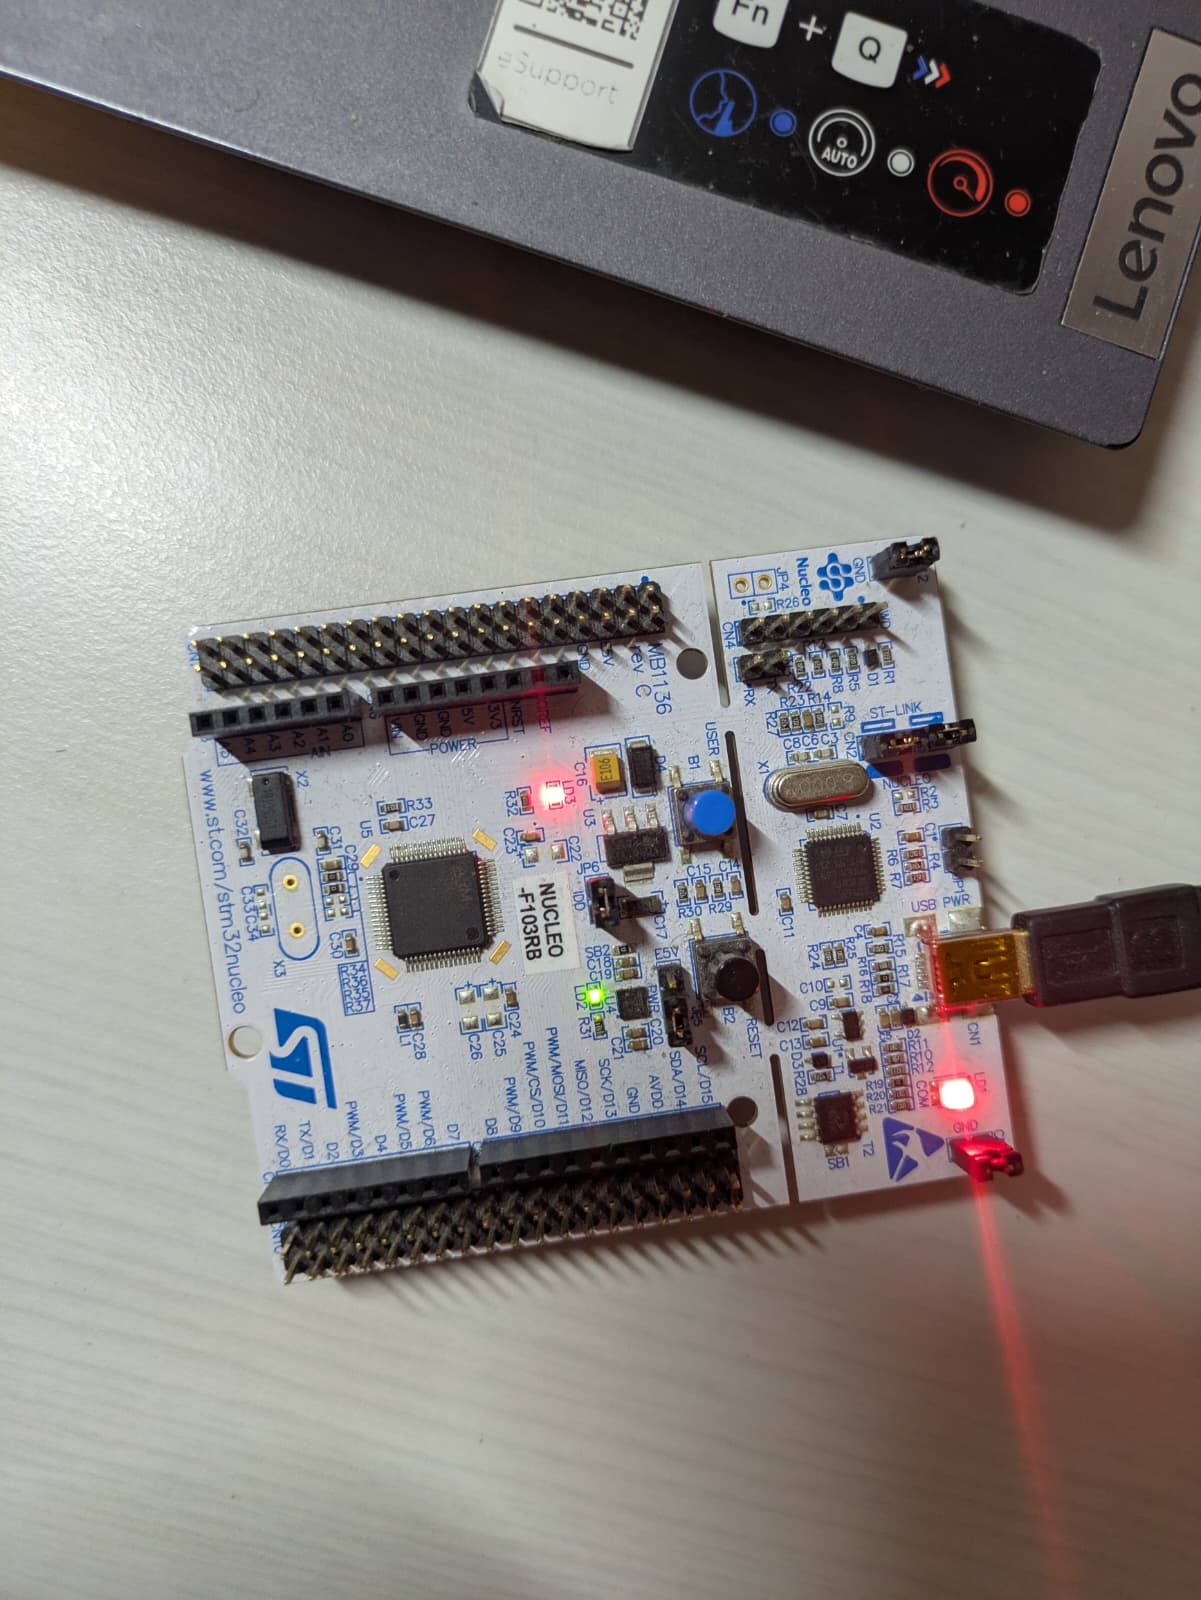
Your LED should now be blinking. 🟢
If
west flashfails because a runner is not installed, check which runners your board supports by inspectingzephyr/boards/<vendor>/<your_board>/board.cmake.
Step 11 - Hello World over UART
Now that blinky works, let's verify serial output using the hello_world sample and picocom.
First install picocom if you don't have it:
sudo apt install picocom
Build the sample:
west build -p always -b <your_board> samples/hello_world
west flash
Find your serial port. On Linux, most boards show up as either /dev/ttyACM* or /dev/ttyUSB*:
ls /dev/ttyACM*
ls /dev/ttyUSB*
Open a second terminal and connect with picocom at 115200 baud:
picocom -b 115200 /dev/ttyACM0
Keep this terminal open and visible. Then go back to your first terminal and press the Reset button (black button labeled RESET on the Nucleo) to trigger the boot message. You should immediately see:
*** Booting Zephyr OS build v4.4.0 ***
Hello World! <your_board>
Important: picocom must already be connected before you reset the board. The message is printed once at boot and won't repeat - if you connect after reset you'll miss it.
To exit picocom: Ctrl+A then Ctrl+X.
What's Next?
Now that you have a working Zephyr setup, here are some natural next steps:
- Explore the Zephyr device model - understand how
zephyr.dtsandKconfigconfigure your hardware - Write your first Zephyr application - threads, semaphores, and GPIO with the Zephyr API
- Add FreeRTOS compatibility layer - if you're migrating existing FreeRTOS code
Conclusion
Setting up Zephyr on Ubuntu 22.04 is straightforward once you know the gotchas - and the biggest one is Python 3.12. The official docs assume you're on a modern distro; on Ubuntu 22.04 you need to handle the upgrade manually. Everything else is the same regardless of which board you target.
Once past that, the West toolchain is genuinely impressive: one command to initialize the workspace, one to build, one to flash. No Makefile wrestling, no manual linker scripts, no vendor IDE project files.
Zephyr is worth investing in - it's the RTOS increasingly asked about in embedded job interviews, and its device model maps directly to production-grade firmware architecture.
Found this useful? Subscribe to the TA Embedded newsletter for more embedded systems content.